Recently, I was talking about processing methods with a barista friend of mine when he admitted he wasn’t sure what “honey processed” meant. I then remembered all the photos and videos I’ve been stocking in my laptop for more than a year now, thinking I really should do something with them.
Even though I had read a lot about it before, the different methods to process coffee all really made sense when I saw them with my own eyes. And so I reopen my notebooks and photos with the hope this will be useful to somebody.
I’m going to try to write as simply as possible and in the most accurate way I can for those of you who have never heard about this before. I will only write about what I have seen in Costa Rica, people in different coffee growing countries do things differently.
A few months ago, I gave you some basic information about coffee and some stories about how coffee cherries are picked.
Today I’m going to talk about what happens to the beans after being picked. The idea is to explain how to go from the cherries newly picked:
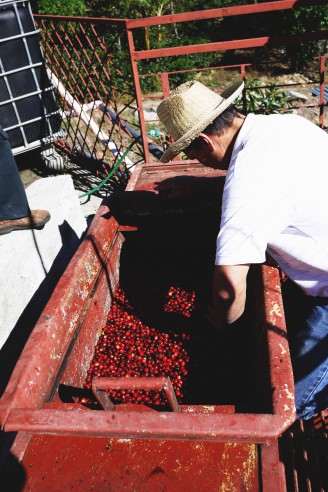
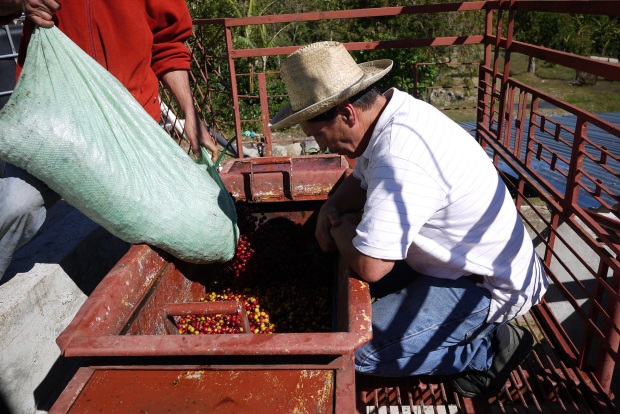
The coffee picker gathers the cherries he picked in huge bags that he carries to the weighing station. Someone is in charge of measuring the cherries he had picked that day (coffee pickers are paid by the weight) in those big boxes called “cajuela” (which is about 20 litres), here el dueño of the finca La Pira, Carlos Ureña.
To beans drying in the sun:

No more fruit, no more mucilage, just the beans drying in the sun
This is called the washed method. It is the most common way to process coffee cherries and usually the one that gives a cleaner mouthfeel. Maybe you buy your beans at your local roaster. It may be a specialty coffee roaster, I mean someone who knows exactly where the beans come from, which country, which growing region, the name of the mill it’s been processed, the name of the grower, the processing method used, the varietal of coffee, the altitude it grows at, the year it has been harvested and last but not least, the date of roast.
example:
Costa Rica, Santa Maria de Dota.
Finca La Pira (1500m), Carlos Ureña
Washed caturra, picked in January 2013
What does washing coffee mean?
The scene takes place in a “beneficio humedo”, a wet mill in English. This is one of the (many) important steps to not ruin the harvest. Once the coffee is picked, it goes through a few stages before changing from a cherry to a bean. First of all, it needs to be sorted out.
Why?
Because no matter how careful coffee pickers are (or should be), there will always be leaves or little stones or unripe berries that will sneak in but are unwelcome in your cup.

What you don’t want!
How are the cherries sorted out?
Buoyancy is the key. Everything that floats is removed in different stages. If you put the cherries in the water, the denser ones will sink whereas the leaves, wooden sticks and bad cherries will float.
What’s a bad cherry?
The unripe ones, the empty ones (some look perfectly normal, yet they might have just one empty bean inside which will make it float).

Example of things that floats: unripe cherries, small branches
At several stages during the process, the floating cherries are separated from the sinking ones (very often processed and dried for local consumption).
Side note for advanced coffee lovers about the difficulty of growing yellow catuai: as you can see in the photo below it is not easy to see the difference between a “green” unripe yellow cherry and a ripe one.
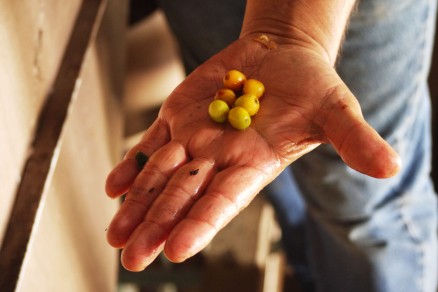
From “green” yellow unripe cherries (bottom line) to almost ripe to ripe (furthest ones)
Instead of explaining with words, I thought I might as well share the “drawing” I made to sum things up in my notebook. It’s not detailed and then again I’m not sure that’ll help anyone but me, but you never know. Maybe you can even read French or Spanish, good luck!
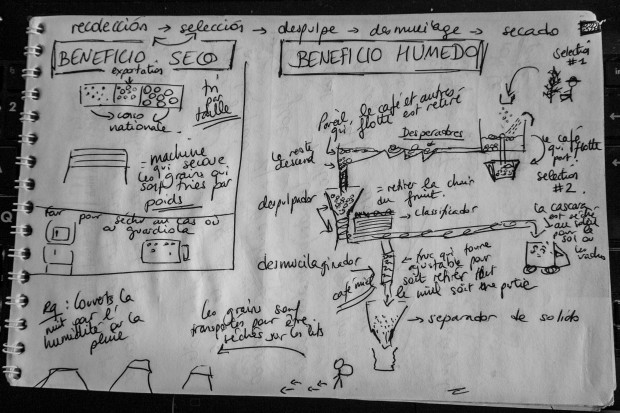
On the right hand side, what basically happens in a wet mill
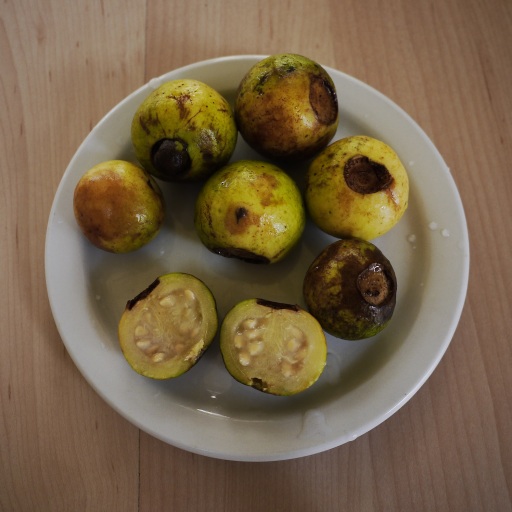
Remember what the inside of a cherry looks like? The most common coffee cherry has two beans inside, covered by a sticky envelope called “mucilage”, covered by the flesh of the fruit, covered by the skin.

Once the cherries are sorted out, the adventure continues. First they travel through a machine called “despulpador” that removes the pulp (the skin and the flesh of the cherry) so that only the mucilage is left around the bean. It is not as painful as it sounds.
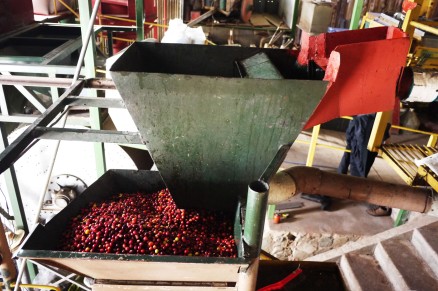
Cherries queuing up before going further down through the “despulpador”

What the inside looks like
“What happens with the pulp and the skin then”? I hear you think. And that’s a really good question. Several options. Most farmers use it to fertilize the soil in the cafetal (coffee plantations). Sometimes, it is taken very good care of and carefully dried to make an infusion. It is called Cascara and is quite good.

Once removed from the beans, the fruit is dried and spread around the cafetal to nourish the soil.
Once they are ready, the beans carry on their journey through a sort of big wheel called a “clasificador” that will sort them out one more time. The goal is to remove the broken beans and the ones that are too small.
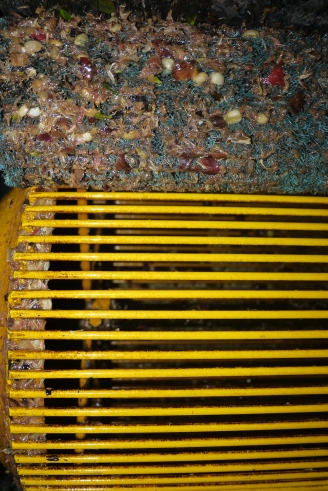
A “clasificador”
Once this is done, the beans are guided through the “desmucilaginador” that will remove the mucilage.This sticky envelop plays a crucial role as it is mainly sugars and alcohols so if you leave it on the bean, it will definitely influence the flavors, which is another option but I’ll get back to it. Removing the mucilage is a very delicate step as sometimes, if the machine is not set properly, the knives can damage the beans, which will then go to the defect category.

A “desmucilaginador”

The inside of a “desmucilaginador” in a different wet mill (Afaorca)
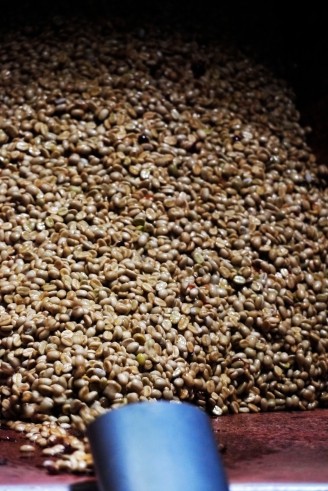
Beans coming straight out of the desmucilagilador, ready to start drying
Fermentation is another more traditional way to get rid of the mucilage. The beans, soaked in water, will ferment, forcing the mucilage to separate. It takes from a few hours to a few days depending on the thickness of the mucilage and the concentration of enzymes. Again, this is a delicate process as you don’t want the beans to get a nasty flavour from over-fermenting.
Remember things are different from a country to another (region to another, mill to another). In Kenya for example, the whole fermenting process happens twice and the beans are soaked one more time for an extra complexed acidity.
Once washed, the beans are finally ready to be transported from the beneficio to the drying area. You may have seen coffee drying on the floor before, either in private properties or professional mills. It works, but not optimal for best results as people walk around or even on the beans, so do dogs or chicken, and dust. To prevent that, drying beds (also called African beds as they were first used in Africa) are commonly used in the best micromills. It also helps for a more even drying process as the wind can circulate from underneath as well.
The beans need a few days (depending on the weather) to dry. We want them to contain between 9 and 11% humidity. Even if they are on beds, the mill workers need to move it every hour or so because obviously, when the sun is shining as hard as it does in the tropics, the upper layers dry faster than the bottom one. I filmed myself doing it one day, it feels nice at the beginning (even relaxing, like those tiny trays of sand that you’re supposed to move with a little rake) but it gets repetitive and hot. Yet it has to be done every day for hours…As you can see, I am no expert:
And then, when the beans are ready, it feels quite different. I’m also amazed at how coffee growers can tell if the beans are ready to be removed or not as this is such an inherent knowledge. There are also machines to double check.
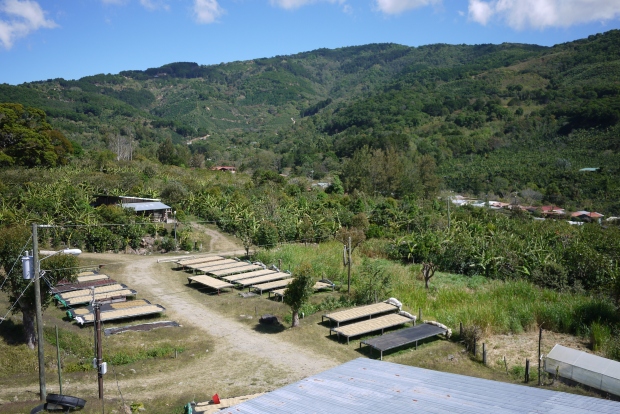
Drying beds at La Pira
Sometimes, particularly in cooperatives where mills are much bigger than this one, the beans are dried in some sort of big drying machine called a “guardiola”. Most farmers would use it as a last drying option when there is no room on beds so they need to accelerate the drying process. However, as they explained to me several times, this would affect the coffee flavours and mouthfeel, since it would be like quickly cooking meat in a microwave versus slowly cooking it on a grill.
So there, it is far from being the whole story, but I’ll get back to it, hopefully before next year!
PS: A big thank you to Carlos Ureña and his family for being so patient with my bad Spanish, answering all my questions, teaching me so much, sharing his passion, allowing me to give a not very agile hand and taking pictures of his beautiful Finca and Beneficio.